Smart Alerts for Salesforce backups - Safe C2C
Using Smart Alerts for a Backup
Proactive data protection helps you to prevent data loss, improve data resiliency, and enhance business continuity. Salesforce Backup - Smart Alerts helps to detect any object changes in the backups done. You can configure the application to receive notifications on these object changes, and on the activities executed with the data that is backed up.
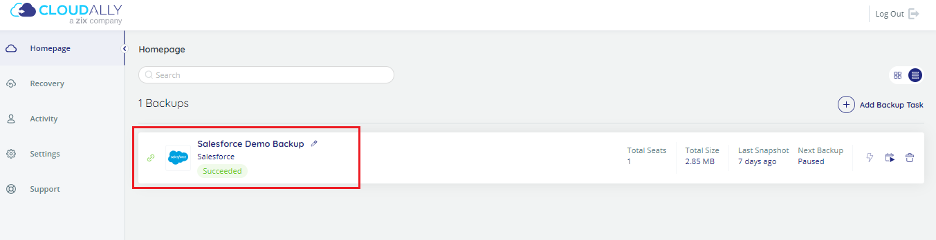
In the Homepage, click the Salesforce backup for which you want to create a smart alert.
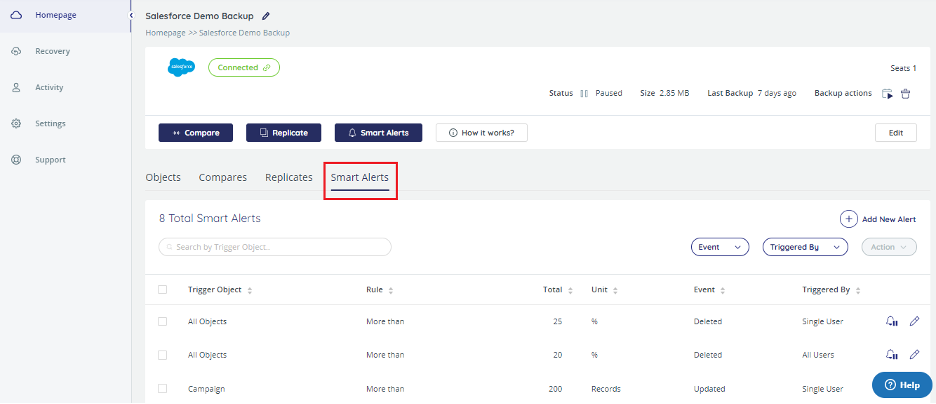
Click Smart Alerts to view and manage existing smart alerts configured for this backup, and to create a new smart alert for this backup.
Creating a new Smart Alert
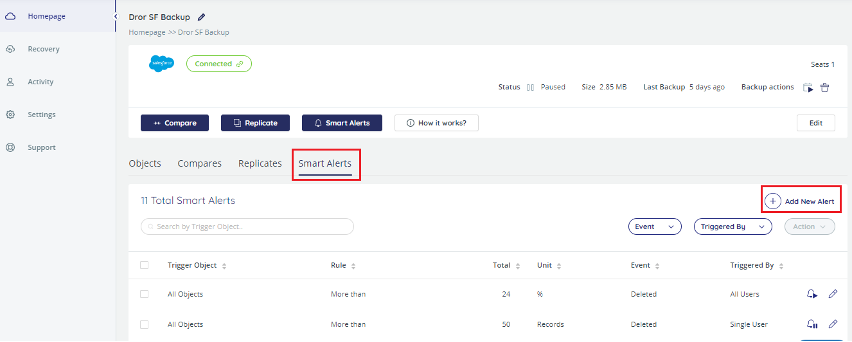
Execute one of the following to create a new smart alert for your backup:
- In the Smart Alerts tab, click Add New Alert.
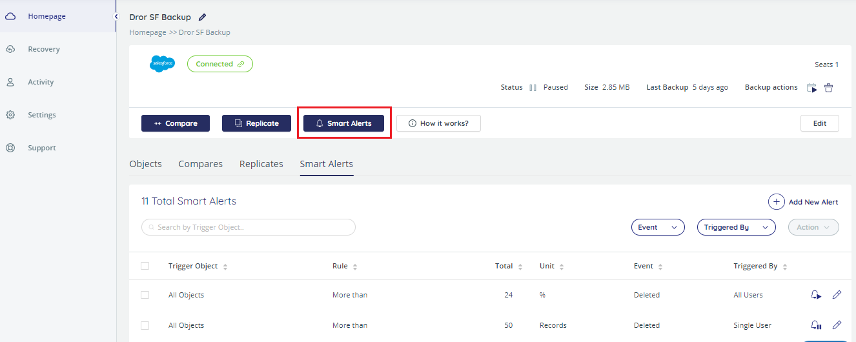
- Click Smart Alerts in the Backup page.
The Salesforce Backup Smart Alert wizard appears, where you must execute the following steps:
- In the Select Alert Level page, select one of the following:
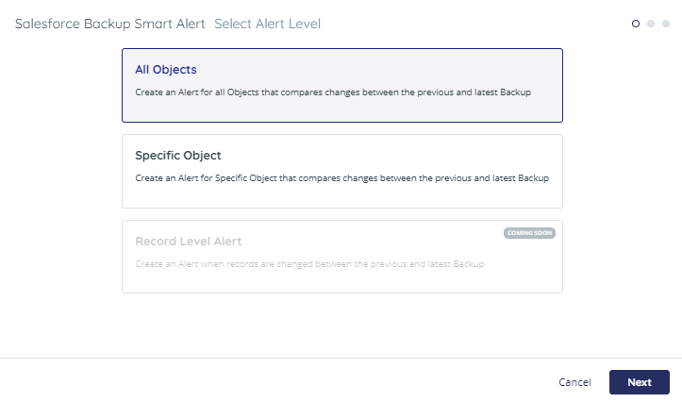
A. Click All Objects to create an alert for all objects in the backup.
B. Click Specific Object and select an object in Choose a Specific Object, to create an alert for this object in the backup. - Click Next to view the Select Alert Configuration page.
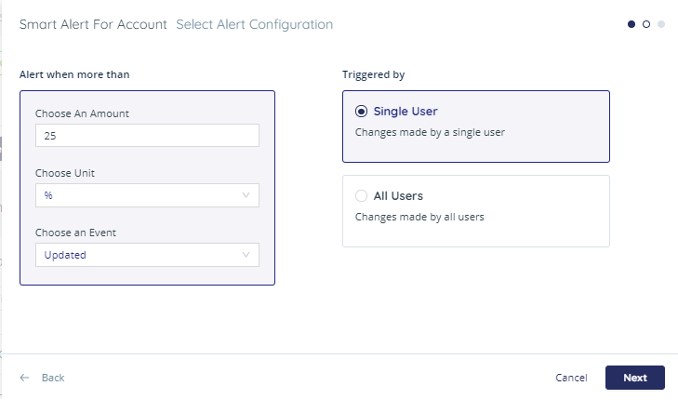
In Alert when more than, provide the amount of data and the event, for which you require the alert to be created. You will receive an alert for the event executed on the number of records or percentage of records in the object.
- In Choose an Amount, enter the percentage or number of records based on the unit selected in Choose Unit for receiving an alert.
- In Choose Unit, select % to create an alert for the specific percent of records, or select Records to create an alert for the specific number of records in the object.
- In Choose an Event, select the required event as Added, Updated, or Deleted, for the alert.
For example, if you have provided Choose an Amount as 25, Choose Unit as %, and Choose an Event as Deleted, you will receive an alert when more than 25% of the records are deleted.
In Triggered by, select:
- Single User to create an alert for the event executed by a single user.
- All Users to create an alert for the event executed by all users.
3. A confirmation message appears for the configuration you have done.
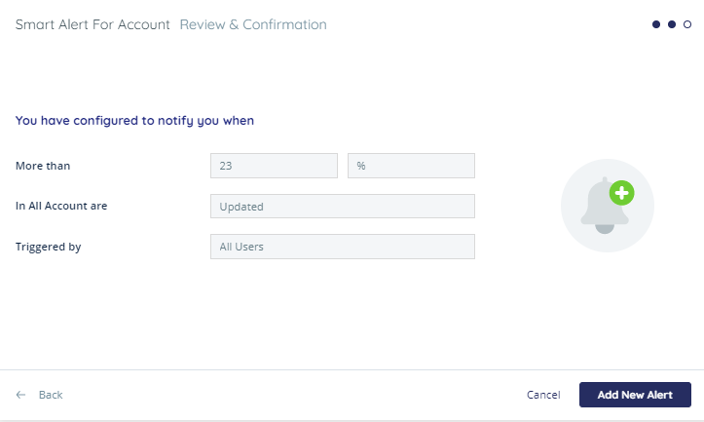
- Click Add New Alert to create the alert.
 Note – Click Back to navigate to the previous pages; click Cancel to cancel the changes you have done.
Managing Smart Alerts
In the Salesforce task Backup page, click the Smart Alerts tab to view and manage the existing smart alerts.
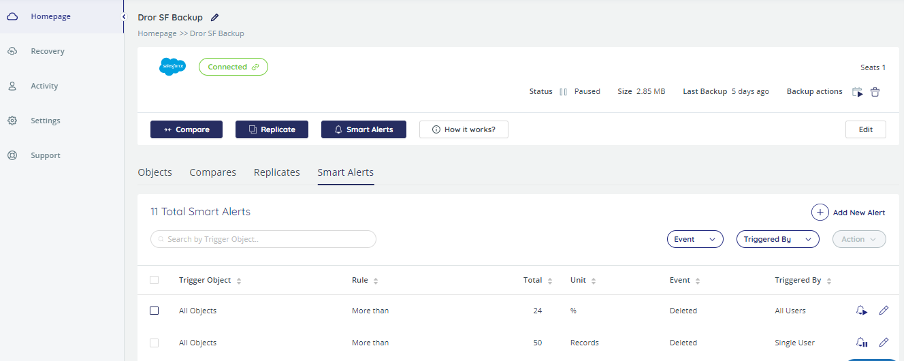
- The total number of smart alerts created for the backup appears. It shows details of the smart alert such as object name, condition, total number of data, unit of data, event for the alert, and if it is a single user or if it is all users who have triggered the event.
- In
 , enter the complete or partial name of the object to be searched for.
 - In
 , select the event name based on which you require to filter the list of alerts.
 - In
 , select the users based on which you require to filter the list of alerts.
 - Use the icons
 corresponding to a column header to sort the list of alerts based on the column.
 - Click
 corresponding to the column headers to select or remove the selection of all entries in the page.
Click  corresponding to an entry to select or deselect the entry. A check box appears that indicates the selection of all entries.
- Click
 to an alert to edit the details. You can update the alert details such as the unit, the percentage or number of records, and the event; click Save Changes to save the details.
 - Click
 corresponding to an alert to enable the alert, or click
  to disable the alert.
 - Select one or multiple alerts, and select one of the following in Actions:
a. Enable to enable the selected alerts.
b. Disable to disable the selected alerts.
c. Delete to delete the selected alerts. A confirmation message appears, where you must click Delete to proceed; otherwise click Cancel.
Configuring Notifications for Smart Alerts
Select Settings > Notifications to configure the notification settings for the smart alerts.
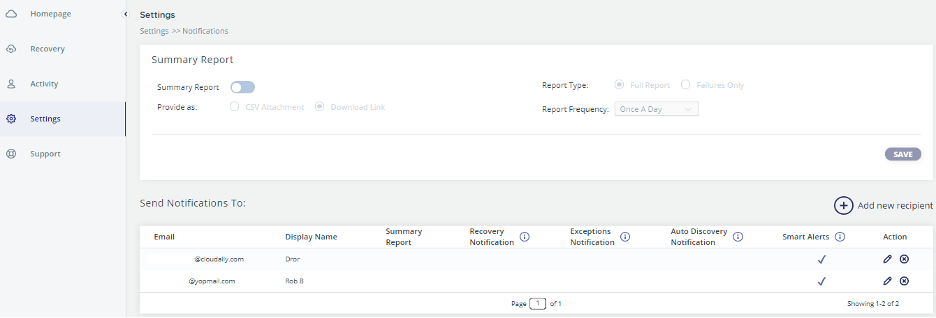
- Click Add new recipient to add a new recipient for receiving notifications. Enter the email address to receive notifications, and enter your name.
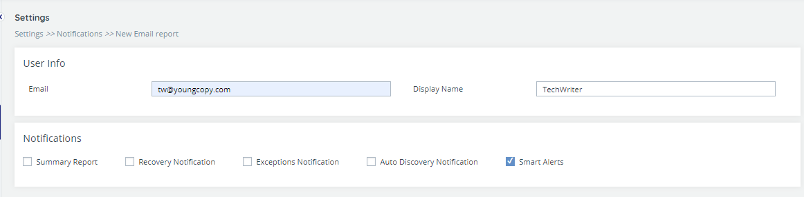
- In Notifications, select the Smart Alerts check box to start receiving notifications on the smart alerts created.
Note – To receive smart alert notifications for an existing user, click corresponding to the required user. Select the Smart Alerts check box and click Save to save the changes.
Related Articles
How to backup Salesforce - SAFE C2C
Our new Cloud to Cloud backup solution is perfect for backing up your cloud solutions to our cloud storage. We can backup numerous products, including SharePoint, Google Workspace, Dropbox, Office365 Exchange, Salesforce and many more. For this ...Modify the settings of an existing backup for Salesforce – SAFE C2C
Login to the portal, or if you are already, select the Homepage option from the Navigation Panel. Here you will see all your backups, you can either select on the one you wish to edit, or you can use the search function if you cannot find it. Select ...Finding your storage size in Salesforce - SAFE C2C
Login into your Salesforce account using your administrator credentials, and select Setup > Administer > Company Profile > Company Information Used Data Space And Used File Space is displayed:Download Your Salesforce Data via Item Search - SAFE C2C
Click the Recovery element from the Navigation Panel. The Restore & Download page is displayed with all your active backup details. Select “Salesforce”. Next you will need to select what you wish to restore from. In this example we are selecting “Via ...Download Your Salesforce Data via Snapshot - SAFE C2C
Click the Recovery element from the Navigation Panel. The Restore & Download page is displayed with all your active backup details. Select “Salesforce”. Next you will need to select what you wish to restore from. In this example we are selecting “Via ...