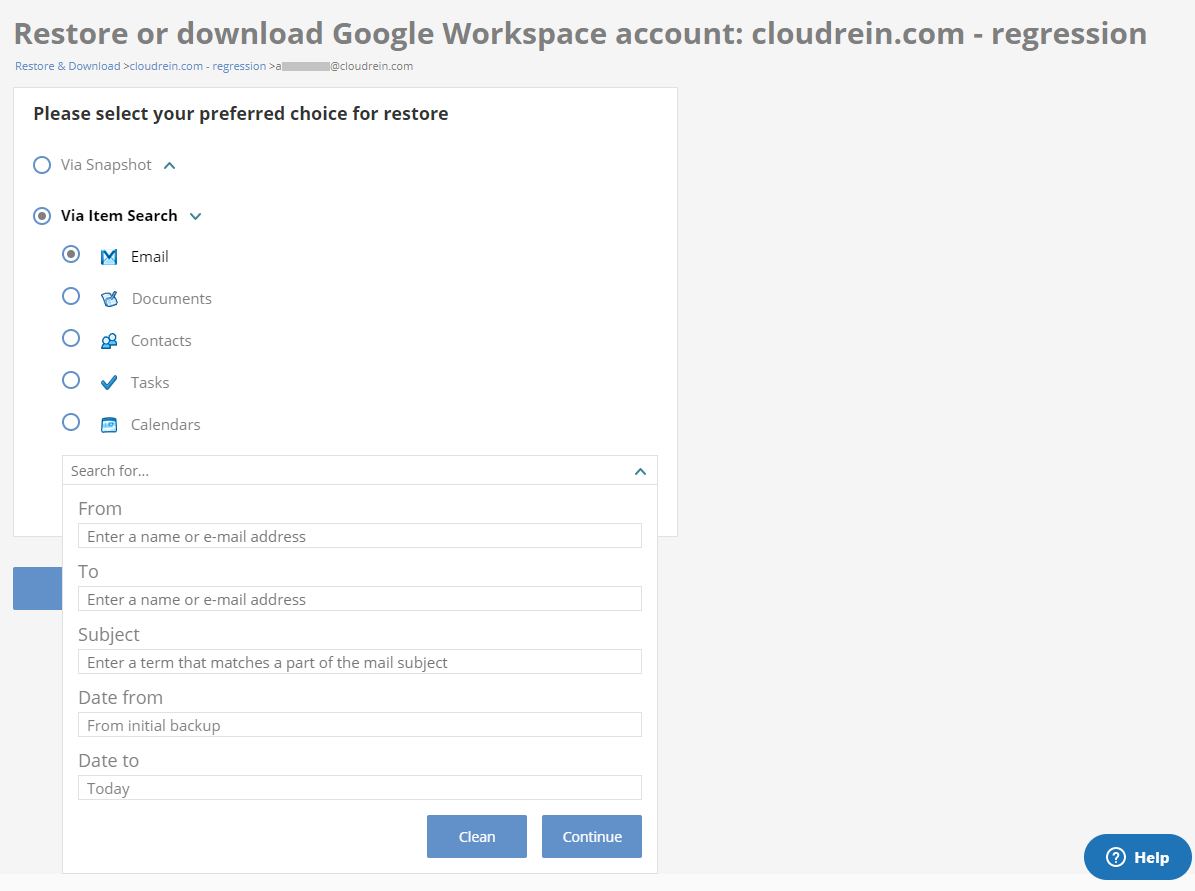
Searching, Restoring, Google Workspace Data - Safe C2C

Searching, Restoring, Google Workspace Data - Safe C2C

The Restore & Download option enables you to restore your backed-up data from Safe Data Storage’s servers. You can perform the following procedure to Restore & Download your Google Workspace accounts:

  1. Click the Recovery element from the Navigation Panel.

    The Restore & Download page is displayed with all your active-backup account details.

    Restore___Download.png

  2. Click the Google Workspace backup task from which you wish to recover the data.

    The Restore or download Google Workspace active accounts page is displayed. 
    restore_or_download_Google_Workspace_active_accounts.png

    This page displays all your Google Workspace accounts backed up by Safe C2C with the details such as Google Account name, First Backup date, Last Backup date, and available Actions. Your backed-up data is ready for download, from this page.

    You can filter the listed accounts using the following options:

    • Enter a keyword in the Search field and all the accounts with the entered keyword are displayed.
    • Filter accounts by statuses such as AllActiveNot ActiveScheduledPausedBacked-up in another taskArchived and In Process, from the drop-down list.
  3. From the Actions column, click the account which you want to restore and/or download.

    The Restore or download Google Workspace account: <account name> page is displayed. 
    Restore_or_download_G_suite_account.png

  4. Select your preferred choice for restore by selecting the radio buttons adjacent to the required option. Available options are the following:
    • Via Snapshot
    • Via Item Search

Restore or Download Via Snapshot

  1.  Click the text fields adjacent to Data changed from and To fields to select the From and To dates from the calendar if you have selected Via Snapshot option.
    Restore_or_download_G_suite_account_with_calendar.png
  2. The list of backup snapshots for the selected account is displayed. Select the archive from which you want to restore the data.
    Restore_or_download_from_G_suite_account.png
  3. You can restore the entire snapshot by clicking the Restore or Download buttons at the bottom of the page.
  4. Alternatively, you can click the searchItem.png button to drill-down into the snapshot and view the item level structure of the backup data. There you can select one or more items for recovery.
    Restore_or_download_from_G_suite_the_account.png
  5. Once you select a snapshot (if you wish to recover all the data in the backup), or an item/items (if you wish to recover only selected items), the buttons Restore and Download become available.
    • If you click the Restore button, the restore confirmation dialog window appears
    • If you click the Download button, the download confirmation dialog window appears 
Please follow the instructions found in the section Confirm the Restore or Download to complete the process.

Restore_or_download_G_suite_account.png

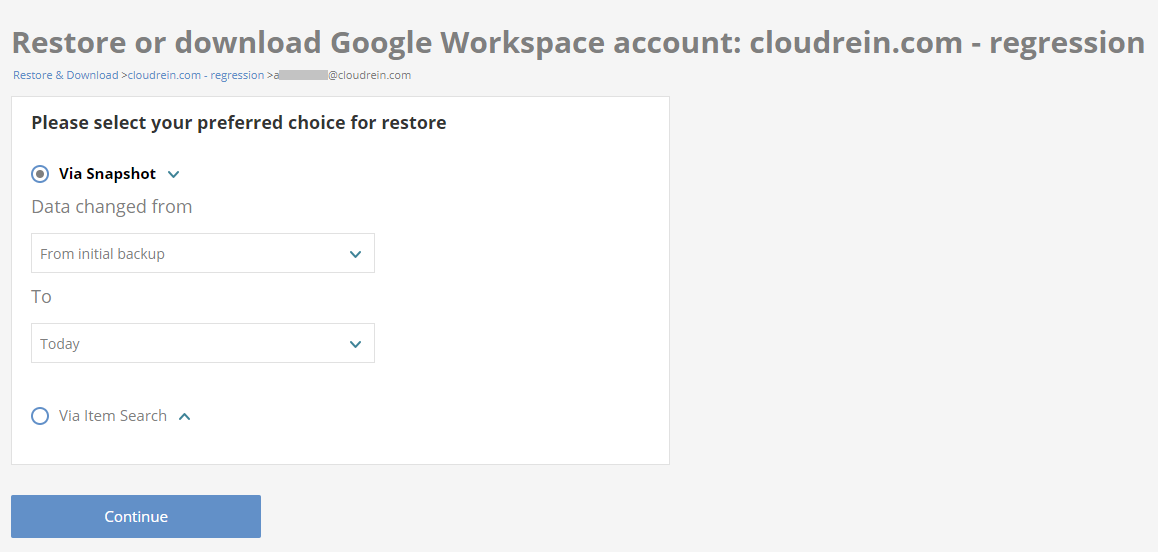
  1. Select the radio button adjacent to one of the following options:
    • Email – Enter a search phrase in the Search for advanced search options, click the icon and provide the following details in the drop-down form:
      • From: Enter a name or email address from which the email was received.
      • To: Enter a name or email address to which the email was sent.
      • Subject: Enter a keyword that matches with any text in the email subject.
      • Date from:Enter the date from the initial backup, from which you want to download the data.
      • Date to: Enter a date until which the data need be downloaded.
    • Documents: Enter a search phrase in the Search for field. For advanced search options, click the icon and provide the following details in the drop-down form:
      • Author: Enter a name or email address of the author of the document. o Item name: Enter a term that matches with the part of the filename.
      • Date from: Enter the date from the initial backup, from which you want to download the data.
      • Date to: Enter a date until which the data need to be downloaded.
        Restore_or_download_G_suite_account_via_item_search__1_.png
    • Contacts: Enter a keyword in the Search for field.
    • Tasks: Enter a keyword in the Search for field.
    • Calendars: Enter a search keyword in the Search for field. For advanced search options, click the icon and provide the following details in the drop-down form:
      • Description: Enter a keyword that matches with the part of the event description.
      • Owner: Enter the name or email address of the owner.
      • Date from: Enter the date from the initial backup, from which you want to download the data.
      • Date to: Enter a date until which the data need to be downloaded.

     For advanced search options click the  icon and provide the following details in the drop-down form:

    • Author: Enter the name or email address of the author of the document.
    • Item name: Enter a term that matches with the part of the file name.
    • Date from: Enter the date from the initial backup, from which you want to download the data.
    • Date to: Enter a date until which the data need to be downloaded.
  2. Click the Continue button.
    Restore_or_download_email_from_account.png

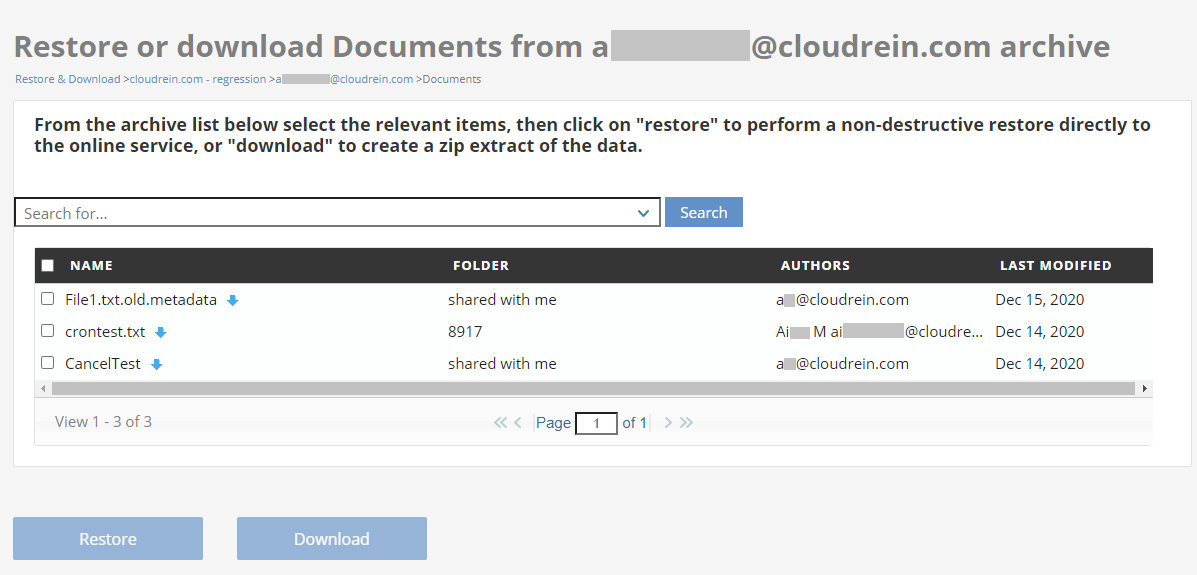
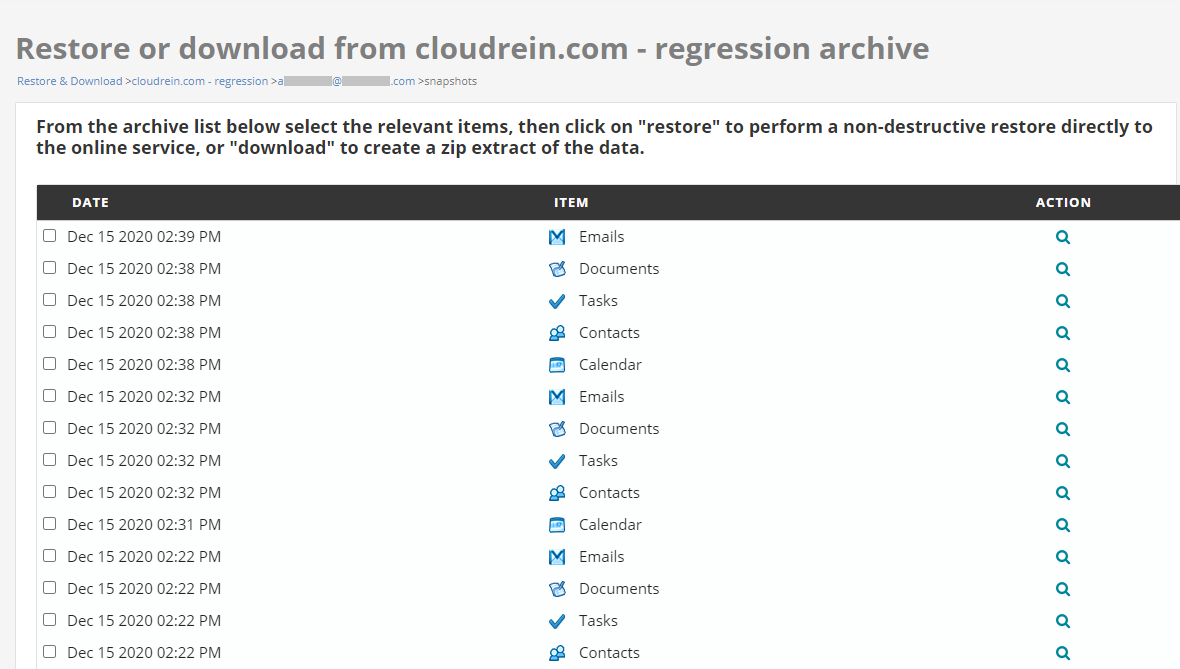
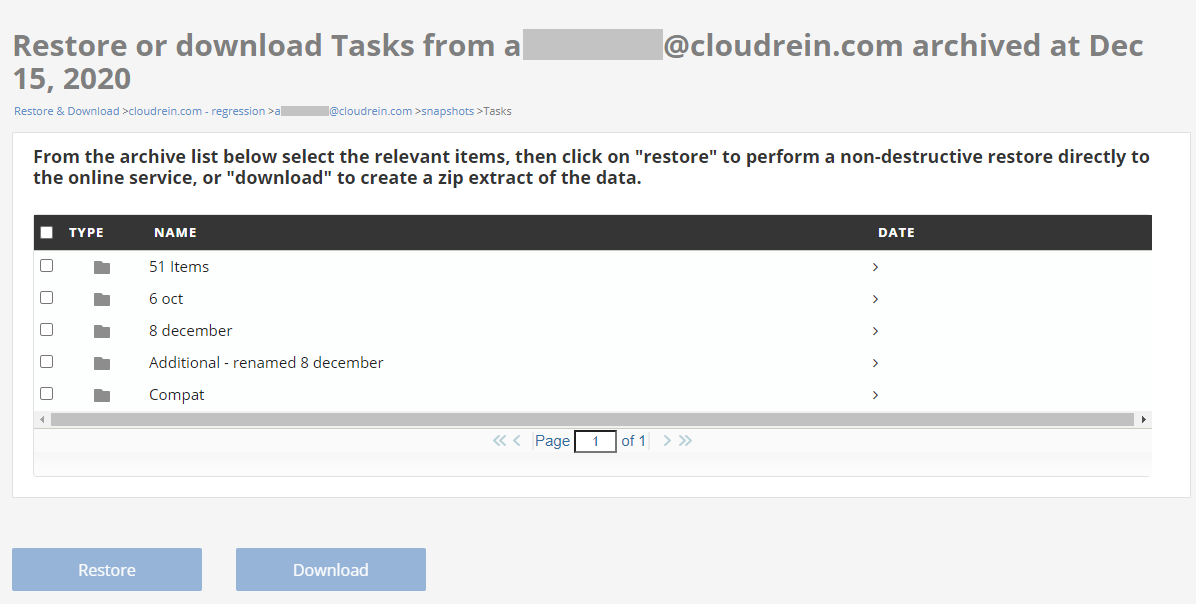
    In the example above the Restore or download E-mails from <account name> archive page is displayed. This page displays the search results with the details such as Date, Subject, and Folder. The title of the page and column names correspond to the type of recovered elements and are different with different search options.

  3. Select the check-box adjacent to the required items to be restored or downloaded. When at least one item is selected the buttons Restore and Download become available.

    Please follow the instructions found in the section Confirm the Restore or Download to complete the process.

Confirm the Restore or Download

If you click the Restore button, the restore confirmation dialog window appears:
Please_confirm_the_restore_request.png
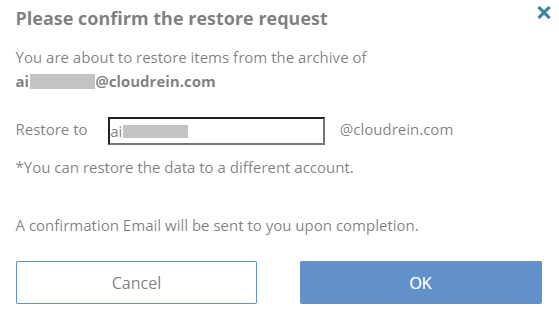
Note: You can restore the data to a different account but within the same domain.

  1. By default, data will be restored to the same account, but you can restore to another account by changing the account name to which the data needs to be restored in the Restore to field.
  2. Click the OK The selected backup data will be restored to the specified account. When the recovery process is complete the results summary is sent to your email. 

If you click the Download button, the download confirmation dialog window appears
Please_confirm_the_export_request.png

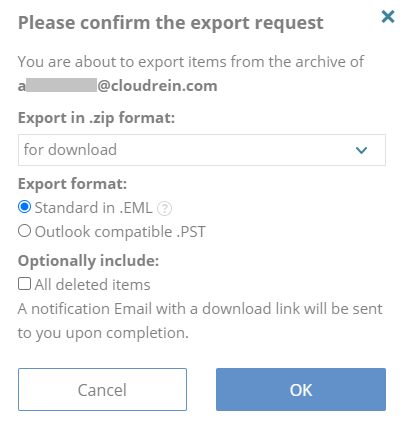
The dialog is adjusted to the export format and may have the following options:

  • Standard in .CSV – the download file(s) type would be according to your section: emails in EML format, Contacts in VCF format, and Calendars in ICS format.
  • Outlook compatible .PST
  1. Click the drop-down list and select the storage. Available options are the following: For Download, to your Amazon S3, to your Azure Blob, to your Box.com, to your Dropbox, to your Amazon S3 Compatible, to your GCP Storage. If you select options other than “For Download”, you may be asked for additional credentials and/or access tokens for the selected storages.
  2. The download instructions are sent to your registered email address. The download link is valid only for 72 hours.

Once the Restore/Download process has been initiated, you can view the current status in the Restore & Download Status section in the Restore & Download page with the details such as Type, Source, Date, Status, and Action.

In the Action column, you can click on the InfoIcon.png icon to view the details in a popup window. You can also click the backupCancel.png icon and click Yes in the Confirm Cancellation window to cancel the ongoing process.


    • Related Articles

    • How to backup Google Workspace - SAFE C2C

      Our new Cloud to Cloud backup solution is perfect for backing up your cloud solutions to our cloud storage. We can backup numerous products, including SharePoint, G Suite/Google Workspace, Dropbox, Office365 Exchange, Salesforce and many more. For ...
    • How to backup Google Shared Drives – SAFE C2C

      Our Cloud to Cloud backup solution is perfect for backing up your cloud solutions to our cloud storage. We can backup numerous products, including SharePoint, G Suite/Google Workspace, Dropbox, Office365 Exchange, Salesforce and many more. For this ...
    • Activating Google Workspace Backups - Safe C2C

      This section details the process of creating new backup accounts for Google Workspace. Note:  Ensure you are a Google Super Admin with full administrative rights for the Google Workspace domain where you would like to install CloudAlly Backup for ...
    • Restoring Box Backup Data via Snaphot - SAFE C2C

      The Restore & Download option enables you to restore your backed up data from SAFE C2C’s servers. You can perform the following procedure to Restore & Download your Box accounts: Click the Recovery element from the Navigation Panel. The Restore & ...
    • Restoring Box Backup Data via Item Search - SAFE C2C

      The Restore & Download option enables you to restore your backed up data from SAFE C2C’s servers. You can perform the following procedure to Restore & Download your Box accounts: Click the Recovery element from the Navigation Panel. The Restore & ...