Compare your Data or Metadata - Safe C2C
With our Salesforce Compare feature you have a powerful tool to compare your data or metadata across backups and/or your production Salesforce database. You can compare any backup snapshot or Salesforce Production/Sandbox and, in case of metadata, even to other organizations.
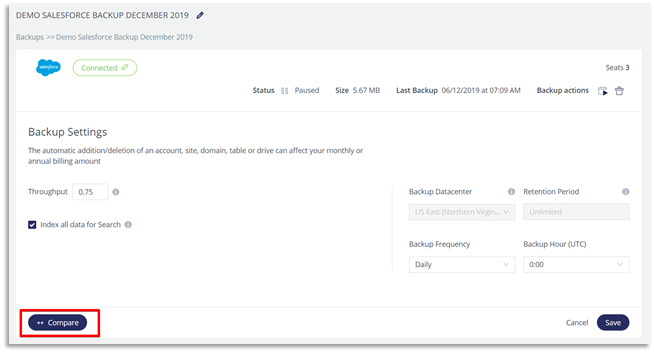
The Compare tool is situated in your backup task details menu:
Comparing data
Initializing the Data Comparison
In order to initiate the comparison procedure please follow these steps:
- Click the Compare button in the backup details page.
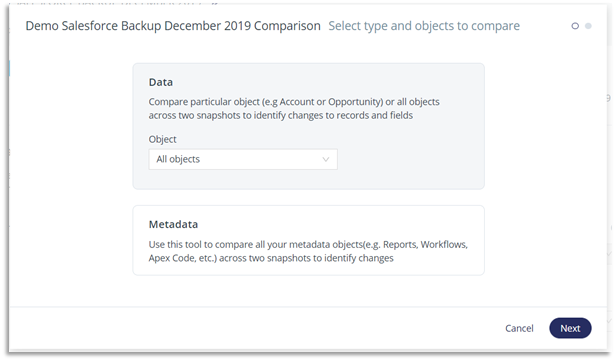
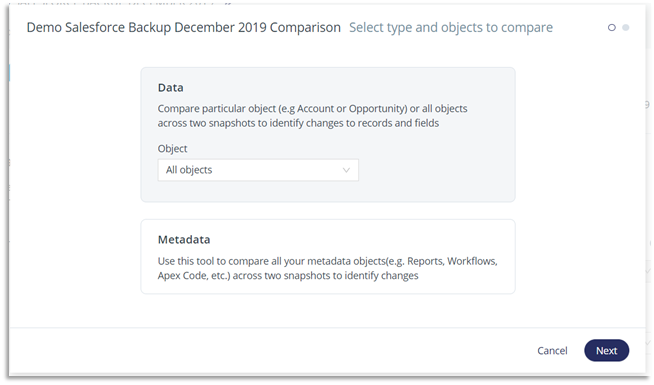
- The compare dialog screen is displayed. The data comparison option is selected by default:
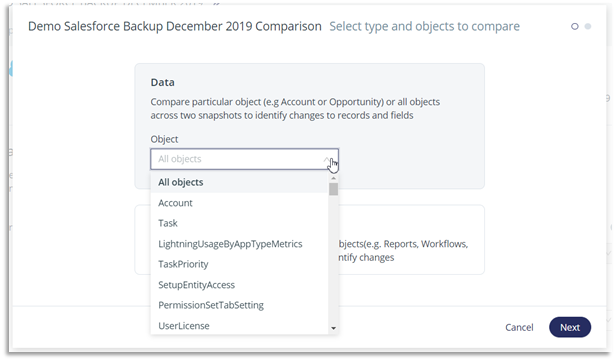
- You can select which objects you want to compare. By default, all objects are compared during the operation. You can select an object from the drop-down menu:
- In the next step you are prompted to select the date of the sources of the data for the comparison:
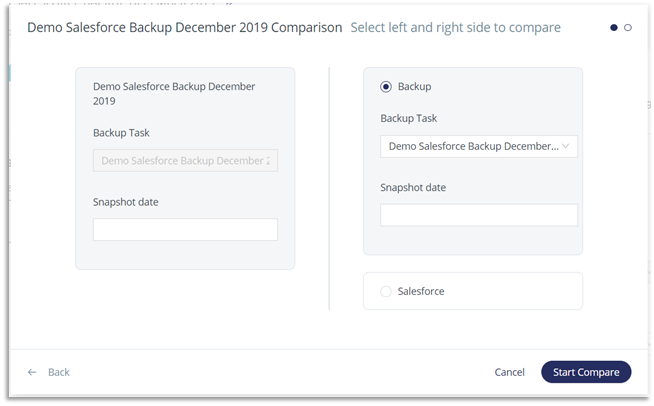
In the left panel of the page you can select the date of the backup task for which you initiated the comparison. The task here can’t be changed. Below you can select the date of the backup, and, if more than one backup had been performed on the selected date, time of the backup.
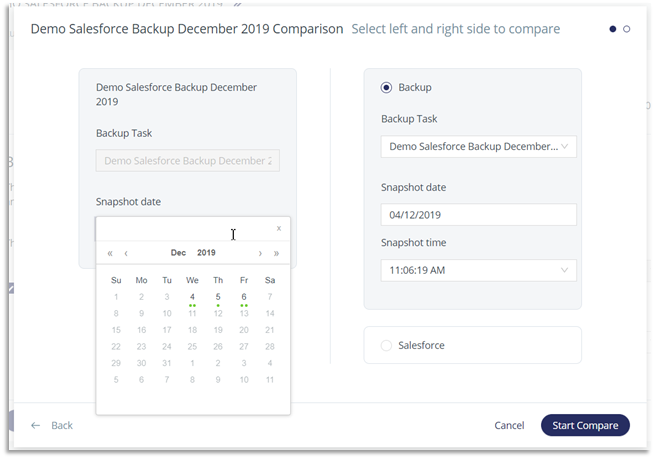
In the right panel you can either select the backup task that will be used for comparison, or the Salesforce production database.
- Once you have set the data sources click the Start Compare button to start the process. The comparison task is started in the background, and the results are available as soon as it is finished.
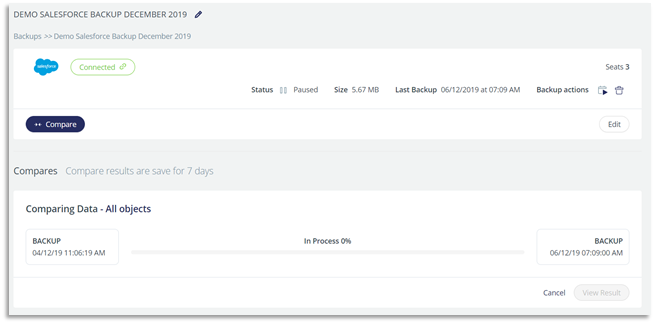
You can cancel the task with the Cancel button before it is finished.
Viewing the Data Comparison Results
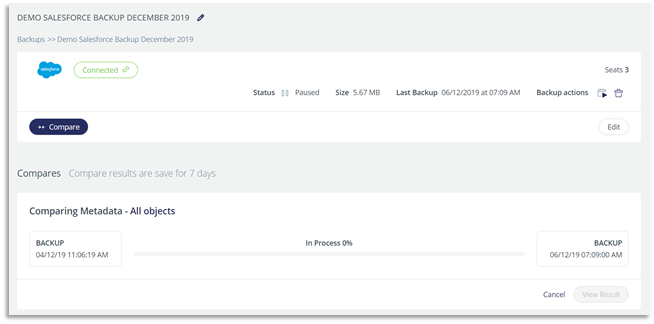
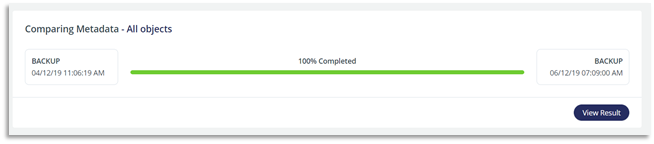
Once the comparison task is finished the View Result button becomes available.
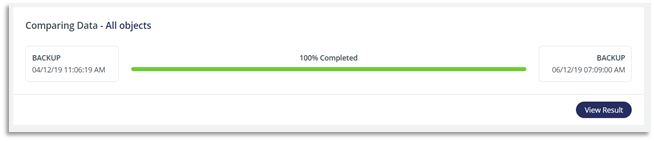
Clicking on the View Result button takes you to the Compare page:
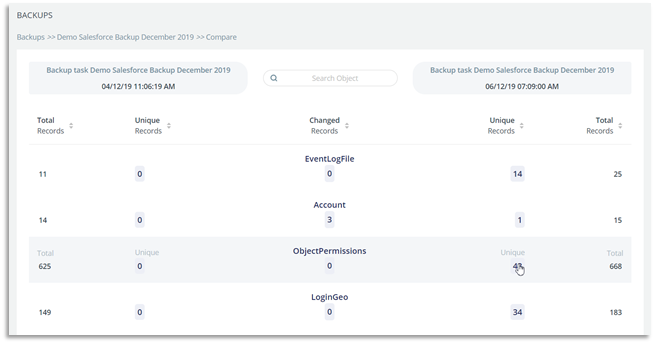
The results in this page are organized in a table displaying the Total number of records, the number of Unique records in each of the data sources and the number of changed records in each of the objects found in the Salesforce database at the point of backups (or in the production database respectively).
In order to find more details on the Unique or Changed elements you can click the corresponding numbers in the table – they contain links to the “comma separated values” (.csv) files containing detailed information on the unique or changed items in the corresponding object.
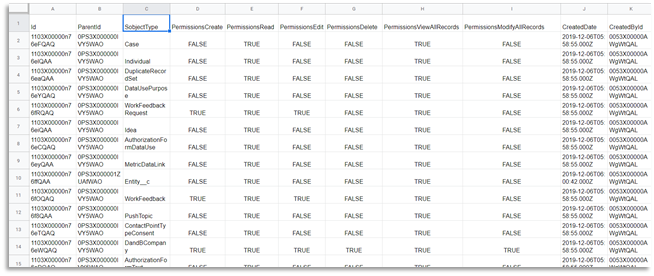
The CSV files created for the Unique and the Changed records are essentially different and describe different aspects of the records. Please see below an example of a CSV file created for Unique records in an item:
The results page can be filtered via the Search bar at the top of the page. The search is case insensitive and requires just a partial match of the name of the objects.
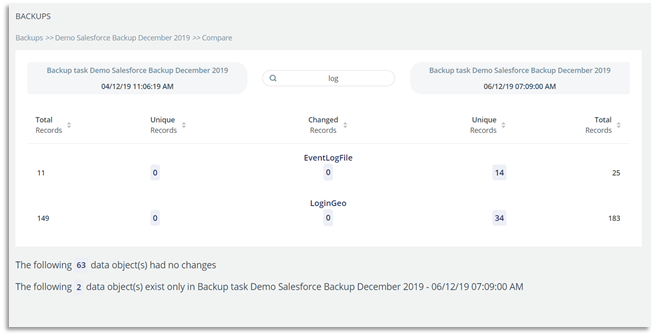
At the bottom of the page you can find the summary of the objects that had no changes, and the objects that only exist in either of the data sources. These numbers can also be clicked, displaying the detailed lists of respective objects:

Comparing Metadata
Initializing the Metadata comparison
In order to initiate the comparison procedure please follow these steps:
- Click the Compare button in the backup details page.
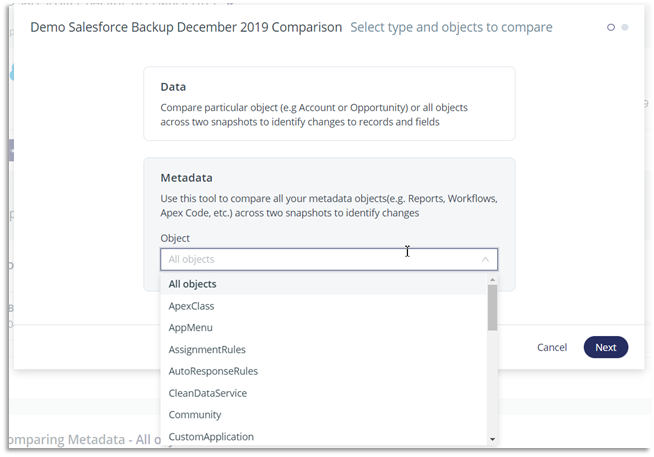
- The compare dialog screen is displayed. The data comparison option is selected by default. Select Metadata option:
- You can select which objects you want to compare. By default, all objects are compared during the operation. You can select an object from the drop-down menu:
- In the next step you are prompted to select the date of the sources of the data for the comparison:
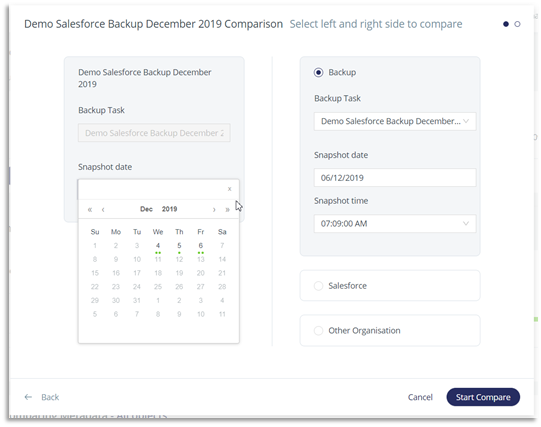
In the left panel of the page you can select the date of the backup task for which you initiated the comparison. The task here can’t be changed. Below you can select the date of the backup, and, if more than one backup had been performed on the selected date, time of the backup.
In the right panel you can either select the backup task that will be used for comparison, the Salesforce production database, or metadata from another organization. In the latter case you can choose whether to use the production database, or the sandbox: 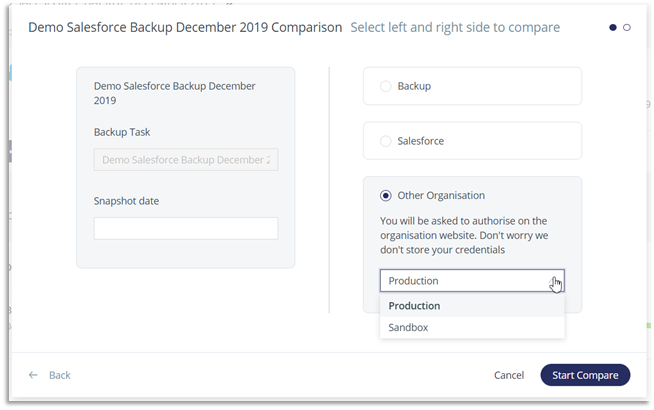
- Once you have set the data sources click the Start Compare button to start the process. The comparison task is started in the background, and the results are available as soon as it is finished.
You can cancel the task with the Cancel button before it is finished.
Viewing the Metadata Comparison Results
Once the comparison task is finished the View Results button becomes available.
Clicking on the View Results takes you to the Compare page:
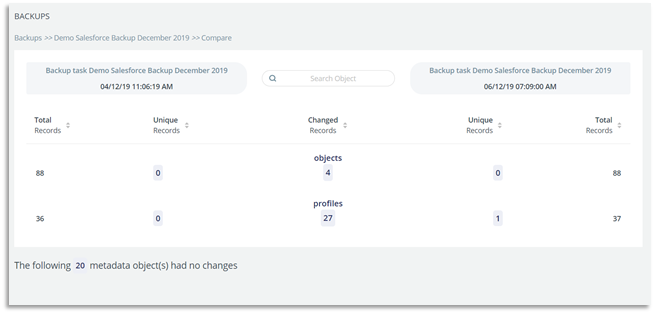
The comparison results are organized in the page in a table displaying the Total number of records, the number of Unique records in both the data sources and the number of changed records for Objects and Profiles.
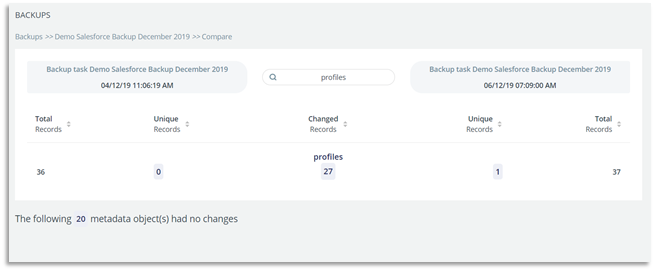
You can filter the page using the search bar situated in the top portion of the page:
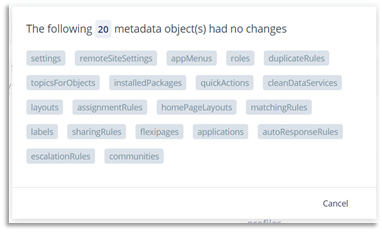
At the bottom of the page you can find the summary of the number of objects that have no changes and the objects found only in one of the data sources. Clicking the numbers of such objects displays the list of corresponding objects:
In order to find more details on the Unique or Changed elements you can click the corresponding numbers in the table This leads you to the comparison GUI.
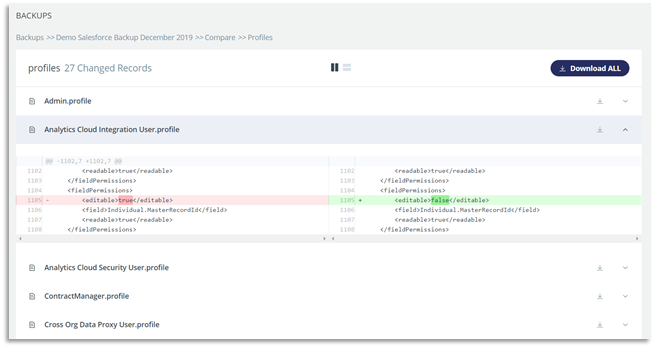
You can expand any row of the table by clicking the  button to view the comparison results, or you can download an archive with the corresponding objects via the
  button. The records can be displayed side-by-side, or over-under – you can switch this with the
  buttons.
Related Articles
Download Your Salesforce Data via Snapshot - SAFE C2C
Click the Recovery element from the Navigation Panel. The Restore & Download page is displayed with all your active backup details. Select “Salesforce”. Next you will need to select what you wish to restore from. In this example we are selecting “Via ...Restore Your Salesforce Data via Snapshot - SAFE C2C
Click the Recovery element from the Navigation Panel. The Restore & Download page is displayed with all your active backup details. Select “Salesforce”. Next you will need to select what you wish to restore from. In this example we are selecting “Via ...Restore Your Salesforce Data via Item Search - SAFE C2C
Click the Recovery element from the Navigation Panel. The Restore & Download page is displayed with all your active backup details. Select “Salesforce”. Next you will need to select what you wish to restore from. In this example we are selecting “Via ...How to Replicate Salesforce Metadata - Safe C2C
How to Replicate Salesforce Metadata Streamline production work in the sandbox by replicating Salesforce metadata at a granular level. You can, of course, replicate a full org with Safe C2C, but what happens if you need to narrow the testing focus or ...Download Your Salesforce Data via Item Search - SAFE C2C
Click the Recovery element from the Navigation Panel. The Restore & Download page is displayed with all your active backup details. Select “Salesforce”. Next you will need to select what you wish to restore from. In this example we are selecting “Via ...